Designers: Size QR Codes for Print (1 cm per 10 cm)
Aim for at least 2 × 2 cm (≈0.8 × 0.8 in) as a technical minimum, but never design to the minimum. The real rule is scanning distance: increase code width by roughly 1 cm for every 10 cm of expected scan distance, so a poster read from 2 metres needs a code around 20 cm wide. Keep a clean quiet zone, check contrast, and test a printed proof on real phones before you commit to a full print run.
TL;DR:
- Dynamic QR codes generally require smaller print sizes, around 2 × 2 cm, compared to static codes, which often need at least 3 × 3 cm for reliable scanning.
- The recommended QR code size should match the expected scan distance, with roughly 1 cm added width for every 10 cm of distance, plus an extra 20–30% for poor conditions.
- Export vector files at final size or raster images at 300 DPI to avoid quality loss, especially when resizing, to maintain module clarity.
- Use a quiet zone at least four modules wide and ensure high contrast between code modules and background for optimal scan reliability.
- Always proof final print samples on the actual substrate across multiple devices and conditions before bulk printing to prevent costly scanning failures.
Table of Contents
- What size should a QR code be for different print materials?
- How do you calculate QR code size from scanning distance?
- Getting the technical print specs right
- Why data density changes your minimum size
- Material, finish, and placement affect scanning too
- The pre-press checklist before you print in bulk
- Why reliable QR codes are a marketing risk issue, not just a design one
- How Qrlytics helps you get print size right the first time
- Sources
- FAQ
What size should a QR code be for different print materials?
Size decisions change with the object, not just the distance from it. A business card gets held close, so a small code works. A poster gets viewed from across a room, so the same code would be useless.
Here’s how that plays out across common formats:
- Business cards: 2 × 2 cm minimum, 2.5 × 2.5 cm recommended. Scan distance is usually 15 to 25 cm, so there’s little margin for error at the smaller end.
- Stickers and product labels: 2.5 × 2.5 cm to 4 × 4 cm, depending on where the sticker sits and whether packaging text competes for attention nearby.
- Flyers and handouts: 3 × 3 cm to 5 × 5 cm. People usually scan these at arm’s length, around 30 to 40 cm.
- Posters and signage: Scale aggressively. A poster viewed from 1 to 2 metres needs a code between 10 cm and 20 cm wide, and outdoor signage viewed from further away needs more still.
- Packaging and cartons: 3 × 3 cm upward, adjusted for curved surfaces and busy artwork nearby.
One detail trips up a lot of designers: static codes generally need to run larger than dynamic ones. Static codes encode the full destination URL directly, which increases data density. Dynamic codes redirect through a short link, so they hold less data and can print smaller at the same scan reliability, a point QR Code Generator’s own guidance makes explicitly when it recommends 2 × 2 cm for dynamic codes versus 3 × 3 cm for static ones.
How do you calculate QR code size from scanning distance?
The formula is simpler than most design briefs make it sound. Nielsen Norman Group’s usability guidelines put it plainly: size the code to how far away someone will stand, then add roughly 1 cm of width for every 10 cm of that distance.
- Estimate the realistic scan distance. A shelf label gets scanned from 20 to 30 cm. A billboard gets scanned from several metres, if at all.
- Apply the multiplier. Distance in centimetres, divided by 10, gives you the code width in centimetres. A 50 cm scan distance needs a code of roughly 5 cm.
- Adjust upward for poor conditions. Dim lighting, older phone cameras, and rushed scanning (queues, transit, night events) all reduce reliable read distance. Add 20 to 30% to the calculated size for any of these.
- Round up, never down. A code that’s slightly larger than needed loses nothing. One that’s slightly too small fails intermittently, which is worse than failing outright because it looks like a fault on your end.
This is the single most overlooked variable in QR design. Marketers tend to fixate on colour and branding while the actual failure point is almost always distance versus size.
Getting the technical print specs right
Export vector files (SVG, EPS, or PDF) wherever your print vendor accepts them. Vector art scales cleanly to any size without losing module definition. If you’re stuck with raster (PNG or JPEG), export at a minimum of 300 DPI at final print size, never scaled up afterwards.
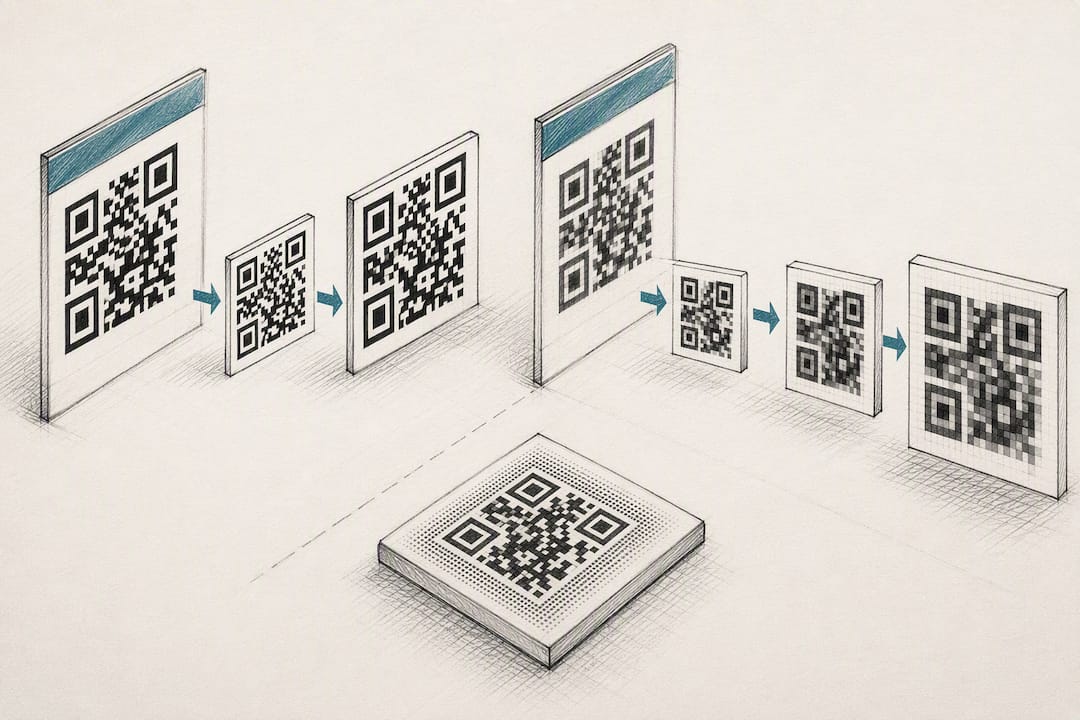
Pro Tip: Never resize a low-resolution PNG upward in a page layout tool. Stretching a 72 DPI web export to poster size blurs the module edges just enough to break scans that would otherwise work fine.
A few technical rules that protect scan reliability:
- Keep the quiet zone (the blank border around the code) at least four modules wide on every side; printing artwork or text into that margin is one of the most common causes of scan failure.
- Maintain strong contrast between foreground and background. Dark modules on a light background scan most reliably, and WebAIM’s contrast checker is a fast way to confirm a colour pairing will read clearly to a camera as well as a human eye.
- Avoid printing over textured, patterned, or low-contrast brand artwork behind the code.
- Stick to black-on-white or near-equivalent contrast when the campaign allows it; branded colour codes need extra testing to confirm they still scan.
There’s no single official DPI threshold cited by a standards body for QR printing specifically, but 300 DPI at final size is the trade convention that consistently holds up under scan testing.
Why data density changes your minimum size
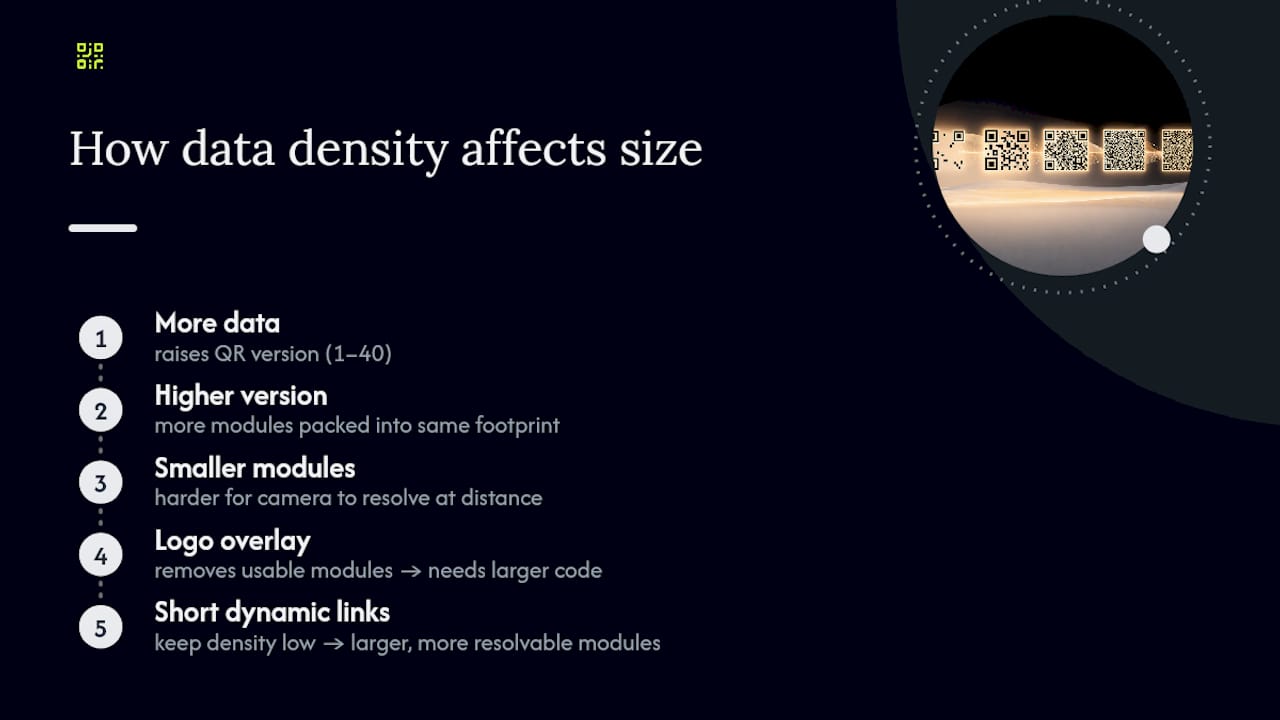
Every QR code has a “version” number, from 1 to 40, determined by how much data it encodes. More characters mean more modules packed into the same physical footprint, and smaller modules are harder for a camera to resolve at distance.
A long tracking URL, an embedded vCard, or Wi-Fi credentials all push the version higher and shrink each module relative to the code’s overall size. Add a logo overlay and you lose usable module space entirely, forcing the code larger still to maintain error correction. Trade guidance on minimum printable sizes consistently points to the same fix: keep the encoded content short. Dynamic, trackable short links hold the data density down while still routing to a long campaign URL, which is exactly why lean, redirect-based codes tend to outperform static ones at small print sizes.
Material, finish, and placement affect scanning too
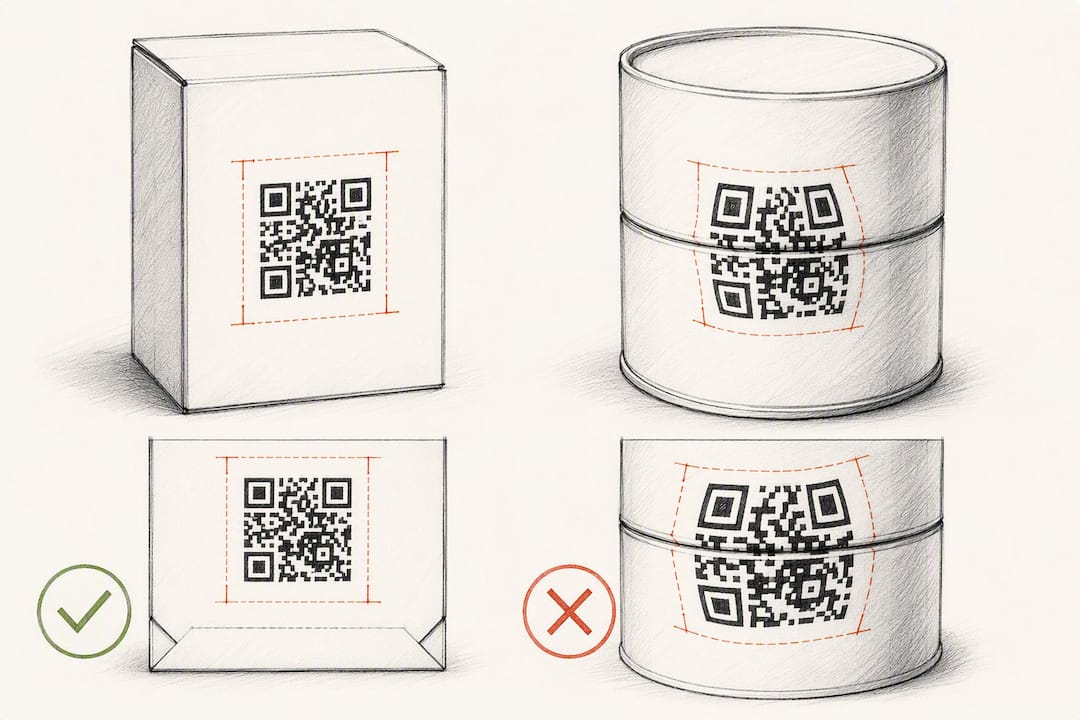
Size alone won’t save a code printed on the wrong surface. Gloss varnish, heavy lamination, and embossing all create glare or shadow that confuses a phone camera, even on a code that’s technically large enough. Matte or satin finishes scan far more reliably.
Curved surfaces, cans and bottles particularly, distort the code’s geometry. Widen the code and place it on the flattest available panel rather than wrapping it across a seam. Leave clear space from trim edges and fold lines on packaging; a code that’s technically the right size but sits 2 mm from a die cut risks losing part of its quiet zone in production tolerance. On cluttered packaging, give the code its own uncontested block of space rather than nesting it beside dense text or imagery.
The pre-press checklist before you print in bulk
Never send a QR code to a print run without proofing it first. The checklist below catches the failures that a screen preview can’t show you.
- Export the code at its true final print size, not a scaled placeholder.
- Print a physical proof on the actual substrate, gloss card, matte sticker, corrugated box, whatever the real run will use.
- Scan the proof with several phones across both iOS and Android, ideally different camera generations.
- Check the quiet zone, contrast, and placement against trim lines under normal room lighting.
- Re-test in the conditions the code will actually face: dim venue lighting, direct sun on outdoor signage, or a rushed queue-line scan.
- Log results in a simple pass/fail matrix by device, then sign off before committing to the full print quantity.
Pro Tip: Get a colleague who wasn’t involved in the design to do the test scan. Designers unconsciously angle their phone correctly because they know where the code sits on the page; a fresh scanner reveals the real-world failure points.
Why reliable QR codes are a marketing risk issue, not just a design one
A QR code that fails on a poster isn’t a minor glitch, it’s wasted print spend and a dead campaign touchpoint. Codes that expire because a subscription lapsed, or links that can’t be updated once printed, turn a design error into a budget loss. Permanent, dynamic codes with built-in scan analytics solve both problems at once: the destination stays live, and you get real data on when and where printed media actually gets used.
— The
How Qrlytics helps you get print size right the first time
Sizing a code correctly only pays off if the code itself keeps working long after it’s printed. That’s the gap Qrlytics closes. Codes generated on an active Qrlytics subscription stay functional permanently, regardless of billing status, so a poster run or packaging batch never turns into wasted print spend because a link quietly deactivated.
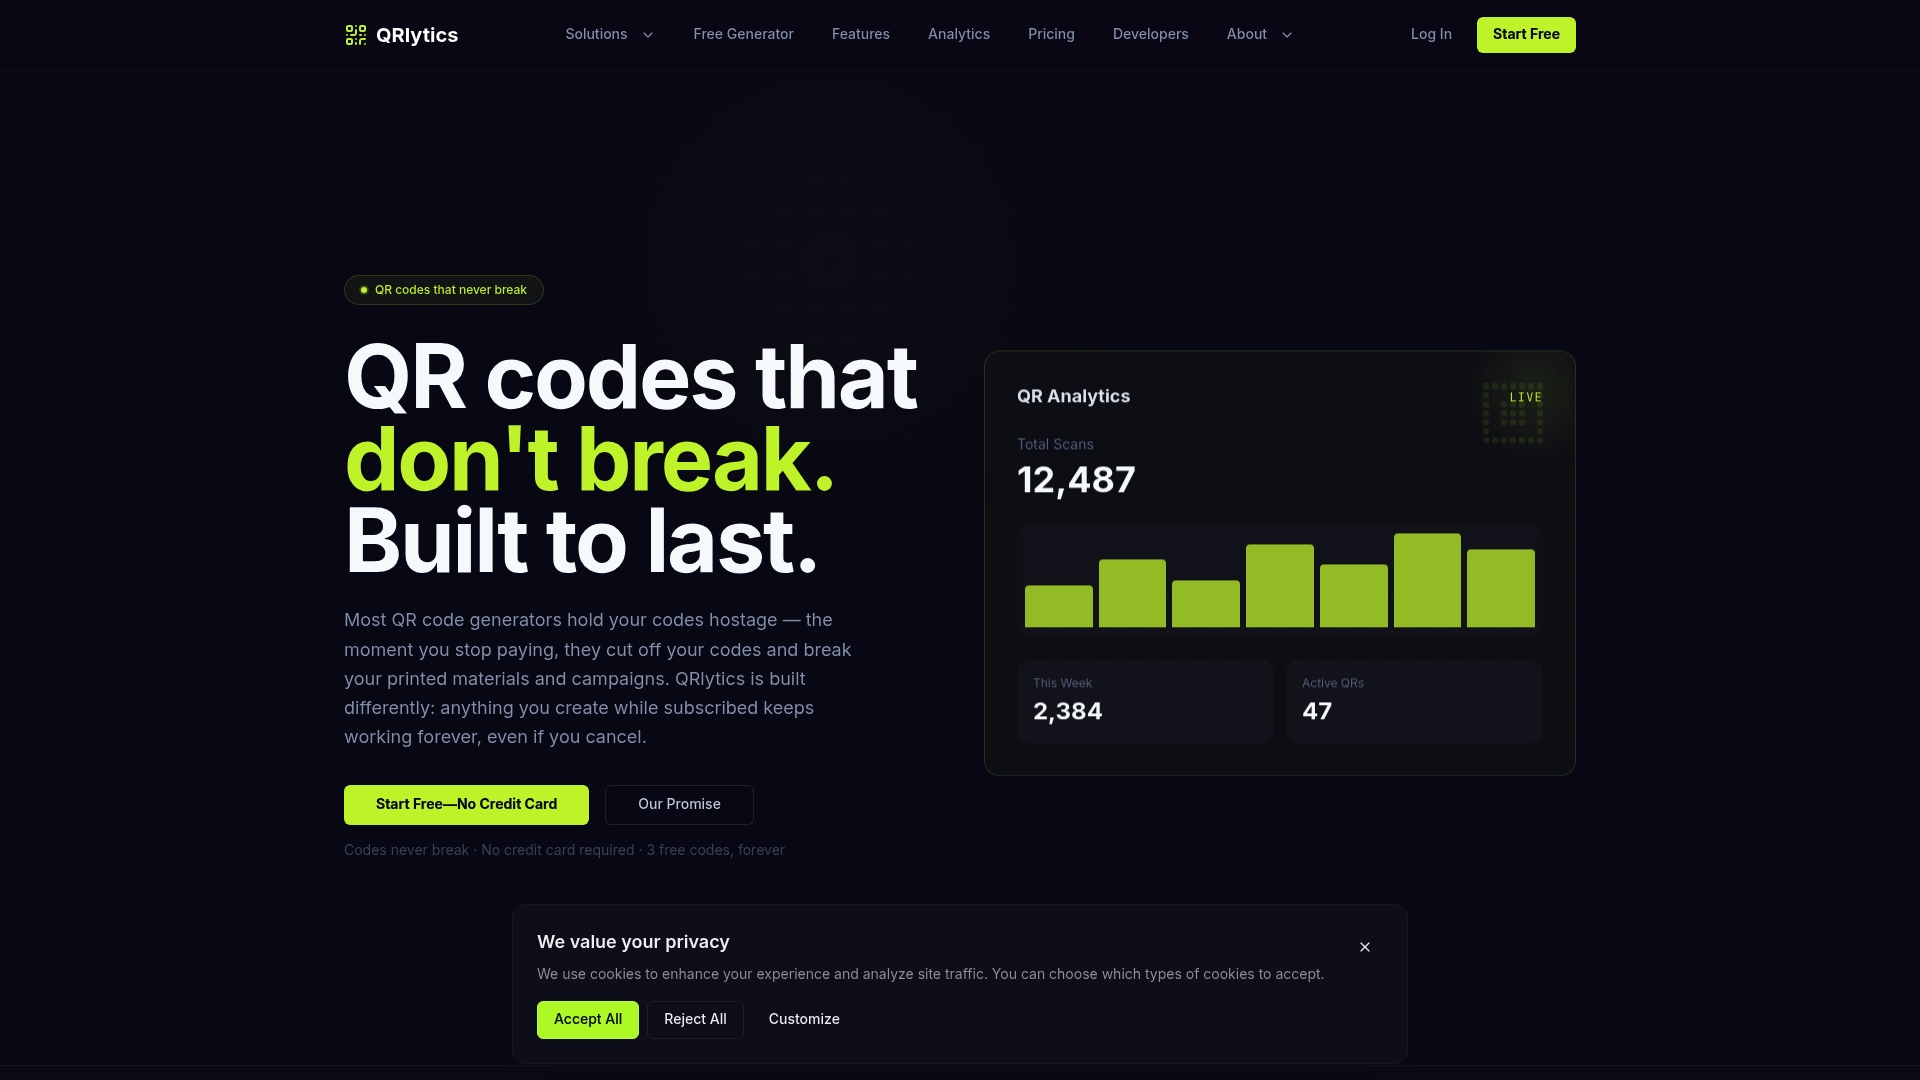
Every code exports at high resolution with customisable branding, so you can hit the DPI and contrast standards this guide covers without fighting your design tool. Because Qrlytics codes are dynamic by default, you can update the destination URL after printing, useful for event badges that need a different landing page each season, or packaging runs that outlive a single campaign. Real-time scan analytics and global heatmaps then show you exactly which print placements and sizes are actually getting scanned, so your next print run is sized on evidence rather than guesswork. Start with the free QR code generator to export a print-ready code and see the analytics dashboard in action, no credit card required.
Sources
Nielsen Norman Group’s QR-code usability guidelines cover scan-distance sizing in depth. QR Code Generator’s print size support page details static versus dynamic minimums. Check colour pairings with WebAIM’s contrast checker, and see StickerGenius’s sizing breakdown for the 1-inch baseline rationale.
FAQ
What is the minimum size for printing a QR code?
The technical minimum is around 2 × 2 cm (0.8 × 0.8 in) for dynamic codes, though many trade guides use 1 × 1 in (≈2.5 cm) as a safer practical baseline for general print use.
What size should I make my QR code?
Size it to expected scan distance rather than a fixed number: add roughly 1 cm of code width for every 10 cm of distance between the viewer and the code.
How do I resize a QR code for printing without losing quality?
Always resize from a vector file (SVG, EPS, or PDF) rather than stretching a raster image, since vector art holds module clarity at any print dimension.
Can I print a QR code smaller than 2 cm?
You can, but reliability drops fast below that threshold, especially for static codes carrying longer URLs; testing on the actual substrate before a bulk run is essential at small sizes.
Do static and dynamic QR codes need different print sizes?
Yes. Static codes typically need a larger minimum, often 3 × 3 cm, because they encode more data directly, while dynamic codes redirect through a short link and can print smaller at the same reliability.